Pole Shot: The Poor Man’s Drone
From the Best of Barry Staver
…Or how to get those high angle shots without a drone, without renting a helicopter, or cherry picker bucket lift truck.
I can’t tell you the number of times a client wanted a slightly elevated angle to show their building, campus, or warehouse where each time they wanted the photo taken from either a small plane or helicopter. Once I quote the rental rates for these aircraft, they go to Plan B, which is the cherry picker. That rental fee, too, is usually more than they want to pay for one photograph.
At this point, I’m ready to suggest Plan C: Using a ladder or a nearby building. A sturdy 10-15-foot ladder is usually enough to satisfy their height requirement. Often a neighboring building’s roof can also get the job done. Tip: If you shoot from too high of an angle, too much of the unsightly roof can dominate the photo. Instead of the nice façade prominent in the photo, the eye goes directly to the AC units on the roof.
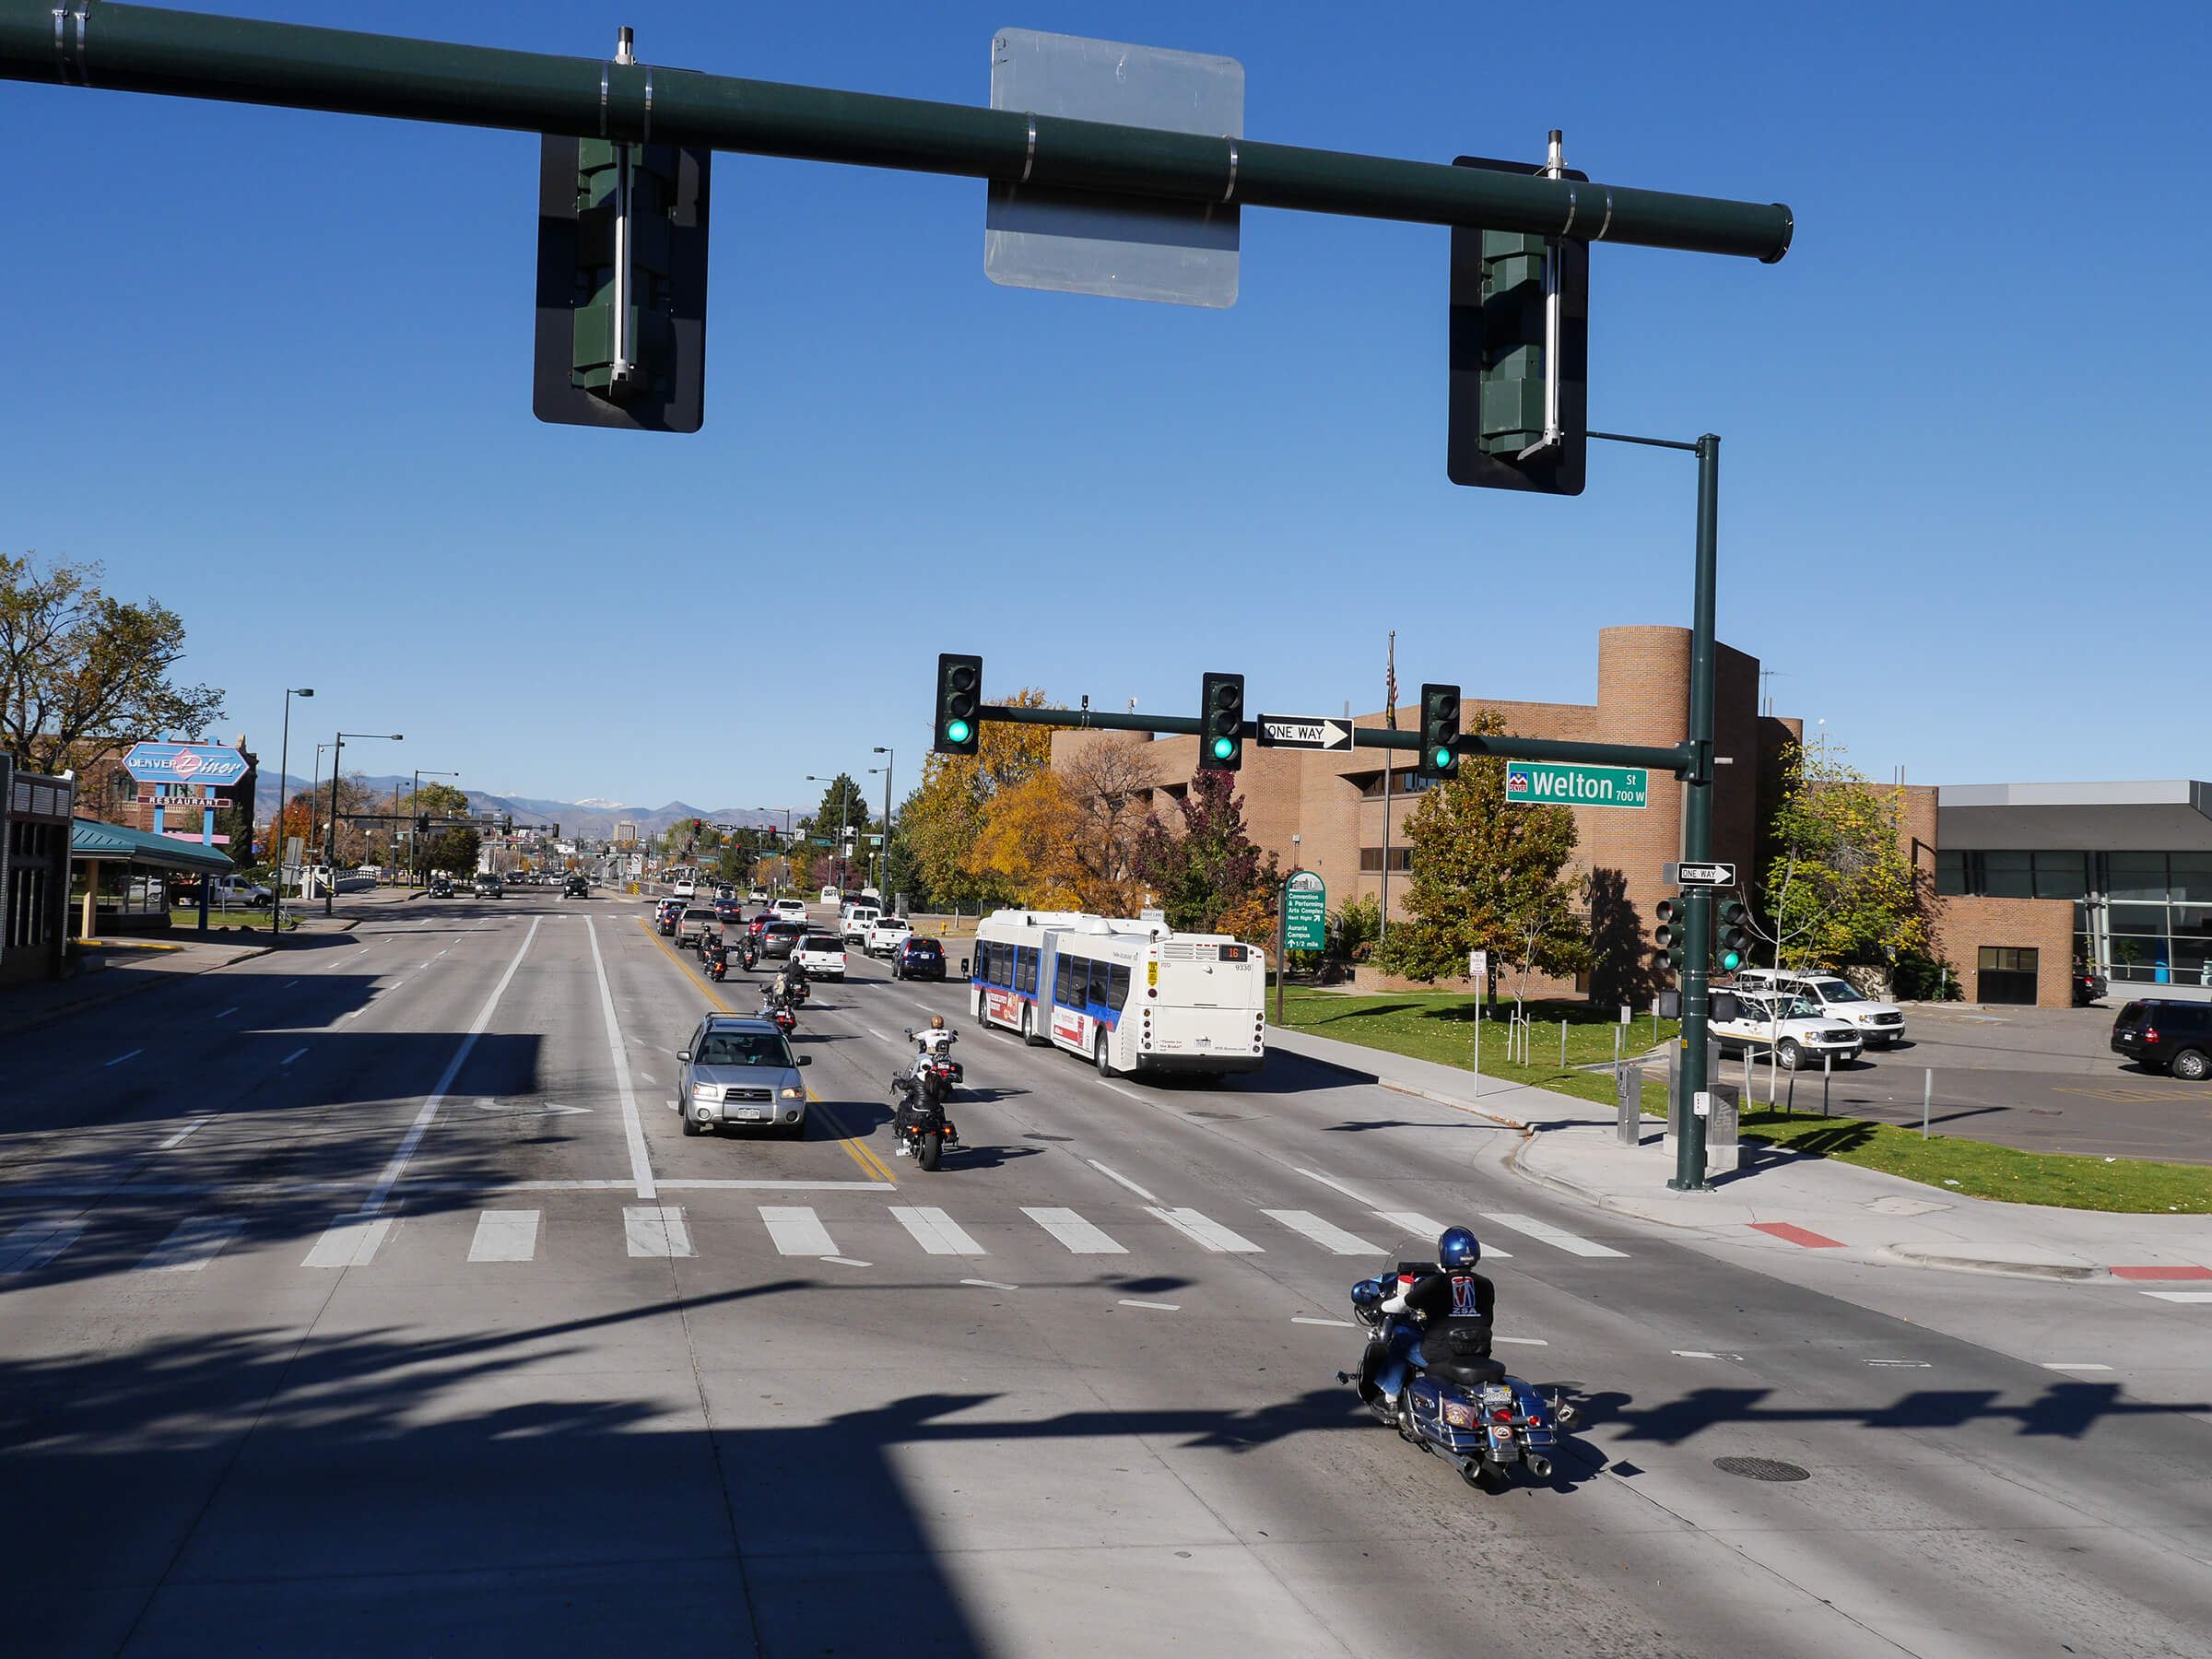
An engineering client made me stretch outside this box and develop Plan D. They designed a computerized system of traffic light control for the city of Denver that synchronized lights along major streets. By driving the speed limit in non-rush hour traffic, the lights ahead should turn green as you get to them. They wanted to see green lights in the photographs. Not just the one at the intersection where I was shooting, but several down the street too.
Plans A and B weren’t considered. Plan C, the ladder, also bit the dust because it’s too dangerous to set up a ladder curbside on busy streets and impossible to put it into a traffic lane. I borrowed an idea from a real estate photographer friend who attaches her camera extends up into the air using a paint pole. She’s able to improve the exterior home photographs, eliminating those nasty converging lines by raising the camera. The pole solution gave me the height needed and the mobility to safely get close to the traffic lanes and also easily move from one location to the next.

Photograph #1, left side shows the GH4 attached to a 15-foot extendable paint pole (yep, regular paint pole from hardware or paint supply store). I did need to buy one specialty item: the Kacey Pole Adapter from Midwest Photo Exchange. It’s a threaded pole to 5/8 stud adapter. I put an old swivel adapter onto the Kacey and screwed that into the bottom of the camera.
My real estate photo friend activates the self-timer on her camera, quickly raises the pole and takes the shot. She’s experienced at this and needs only one shot of the front of a home. Here’s my “higher-tech” way to shoot with the pole, seen in the right-hand image of Photo #1. I bought a couple of angle brackets at the hardware store, gaffer taped them to the pole creating a platform for my iPhone, which is held in place with rubber bands.

I use the free Panasonic Image app on my phone to control the Lumix camera atop that tall pole. The app lets me control focus, adjust aperture, shutter speed, and fire the camera. Once the pole is raised and I’ve got it lined up, it’s easy to shoot multiple images, making camera refinements on the fly. If I were to use this set-up on a regular basis I’d invest in a Pole Pixie. It’s more substantial, sophisticated, and stable way to attach both the camera and smart phone or iPad to a pole.

Photo #2 shows a low level angle of traffic signals. Photo #3 shows how the extra height brings a new perspective to the same scene. These images convey the height difference only and were taken from the median in the center of a busy street. For the assignment I used longer focal length lenses to compress the distance between intersections, showcasing the green lights.


